

how to bleach hair without damage
We all know that dyeing hair at home is still trending as the pandemic is still around us. Many people – especially women, often feel the need for a "new look" this time, and changing hair color may be the fastest way to go. But not so many colors you can just apply to your hair easily and get the best result. In fact, many hair color, especially the bright ones, require hair bleaching first. You may see that dye your hair at home is pretty easy to do, but bleaching your own hair yourself is a totally different story.
Contents
- How to bleach hair at home safely without damage
- Step 1: Check your situation
- Step 2: Gather your materials
- Step 3: Prep!
- Step 4: Mixing the product
- Step 5: Application
- Step 6: Now you wait
- Step 7: Wash It
- Step 8: Assess And Bleach Again (If Needed)
- Step 9: Time To Tone
- Step 10: Invest in a Purple Shampoo/Mask
- Step 11: Repair
How to bleach hair at home safely without damage
Hair bleaching is the process of removing the melanin layer on the hair by using specialized chemicals to make the hair lose its original color and easily absorb the dye in the next hairdressing steps. Melanin a substance in the human body, when this component is removed, the hair will lose its original color and turn white or gray, and thereby create favorable conditions so that the light dye colors can be applied to the hair easily such as smoky gray, pink, platinum, … so that they quickly and easily stick to the hair to help it get a more impressive new color.
How to safely bleach your hair at home
The darker your hair is, the more times you have to bleach it, and even need to use chemicals with a concentrated concentration of bleach. Therefore, they will stick and stay on the hair for a long time from which the hair will lose its original color.
The best tip is go to a salon or let a professional colorist do the bleaching for you. But if you're still looking for a way to by your own, read carefully this How to bleach your hair at home without damage it guideline we're about to share.
Before going into How to safely bleach hair at home, we'll talk about the harm of hair bleaching.
1. It will makes you feel like your scalp is burning for hours
Under the effect of the hair bleach, your scalp can feel like it is burned. And in a worse case, you can also feel the dizziness. Maybe it's the bleach side effect, or it can be caused by your psychology, whatever the reason is, your scalp is greatly affected.
2. Your hair quality will be drastically reduced
Hair bleach contains many chemicals with strong oxidizing and bleaching properties, so after bleaching your hair, your hair will be seriously damaged. It will become brittle, dry and sensitive to the external environment, especially factors such as sun, ultraviolet rays and humidity.
3. It takes time during and after the bleaching process
Of course it will take you time to do exactly how to properly bleach your hair for your best result. It'll need time to take care for the hair after that, too. Especially when you want your hair to have a beautiful color without making the quality worse, you might need a very special care regime including hair shampoo, conditioner, hair spray, hair oil, etc.
4. Because hair bleaching is a relatively complicated technique, it requires long-term experienced hairdressers to be able to do it well.
Hairdressers need to consider the quality of the hair from which to make decisions about the use of chemicals, the ratio of dyes, the concentration, and the interval of hair bleaching times. When you encounter an unprofessional worker (or do it yourself), it can cause scalp allergies, thinning hair and falling in patches.
Are you ready to know how to bleach hair without damaging it too much? Let's go for a step-by-step guide down below!
Step 1: Check your situation
Check if your hair can handle the damage that you're about to do to it, we recommend beginning with an elasticity strand test. Spray some water on a piece of hair, and let it absorb-stretch the wet hair very gently. If the wet hair stretches more than usual, or the texture turns a bit gummy, it is not safe to dye, if the hair goes back to its natural state, it's in good condition to bleach. And we also recommend doing a patch test with a bleach mixture to see how your hair will react using the same method afterward with the small area of processed hair.
Additionally, it's important to understand your current hair color situation. If your hair is already processed, if you have used any type of box dye, or if you have virgin, unprocessed hair, these can cause variations in how your hair will lift with the bleach.
Step 2: Gather your materials
You're going to need a few items in your tool kit before you begin.
- Developer (30v and 20v): This is the liquid base to your bleach (and toner) mixture, when combined it creates what we all know to be bleach.
- Lightener: Usually found in a powder form, this is the second part to a bleach mixture that causes the actual lightening in the hair.
- Purple Shampoo: This will help tone the brassiness in your hair and neutralize unwanted yellow and orange hues.
- Toner: Like purple shampoos, these will neutralize brassy hair on a chemical level.
- Mixing bowl, Gloves, Brush
- Plastic bag/shower cap
Step 3: Prep!
Sectioning your hair in different parts when beginning. For added protection, rub coconut oil from the root to tip within sectioned hair to hydrate hair. You want it to absorb into your hair for at least one hour, even longer if possible and then you can pre-light or bleach.

Step 4: Mixing the product
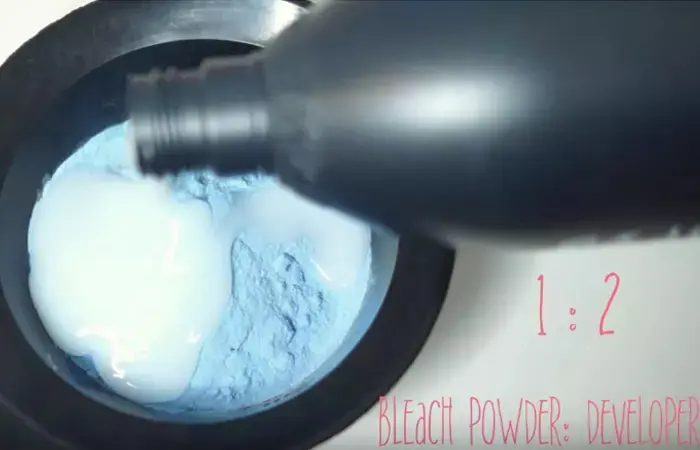
Read the directions on your lightener and developer materials, not all brands are the same, but most bleach mix calls for a 2:1 ratio (meaning two parts developer to one part lightener).
Don't eyeball–proper portions are important, so measure properly! Depending on how much hair you're trying to bleach you might need more mixture as you go, but start with 2 oz of a 30v developer and 1 oz of lightener, add the ingredients to your mixing bowl and combine them together using the painting brush until smooth.
We recommend using one bleach mixture with a 30v developer for the length of the hair and then another bleach mixture with a 20v developer for the roots.
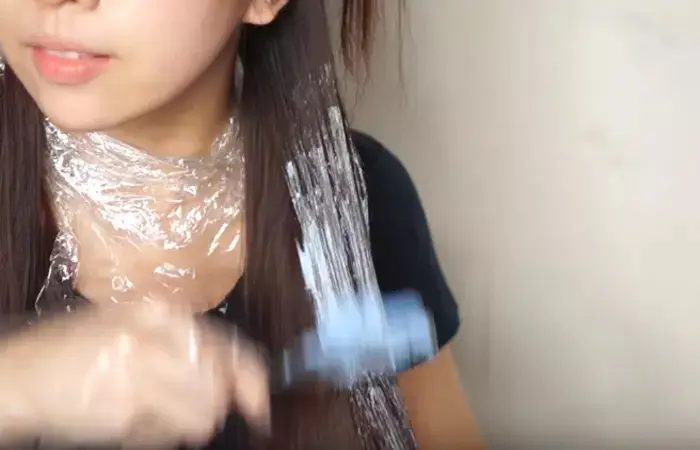
Step 5: Application
For each of the sections that you've divided, apply the bleach with 30 volume to mid-length and ends about two inches away from the scalp, right after, apply the bleach with 20 volume on the roots. We also recommend taking small portions within the sections and saturating the strands to make sure the hair is completely covered. This is the best method to use to avoid hot roots – what happens when you apply bleach to the hair (from root to tip) at once and after processing the roots become a much lighter blonde shade compared to the yellow hair of the length.
The hair closest to the scalp processes color quicker than anywhere else on the hair shaft because the natural heat from the body acts as a heater when hair color is applied. This means that when you are doing a virgin (hair that hasn't been color-treated) application you must apply the color on the roots last, not first.
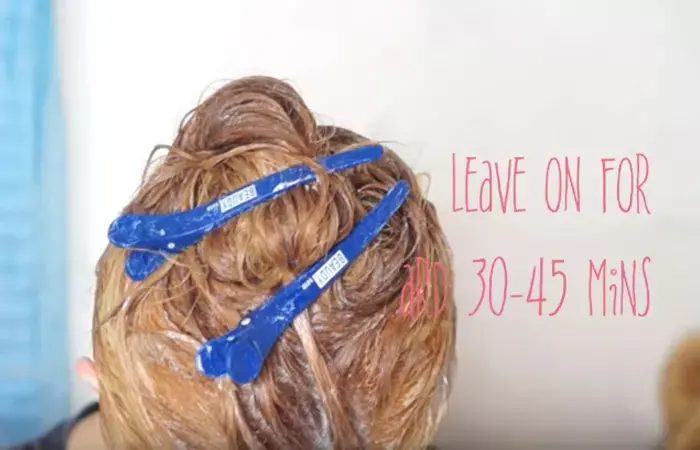
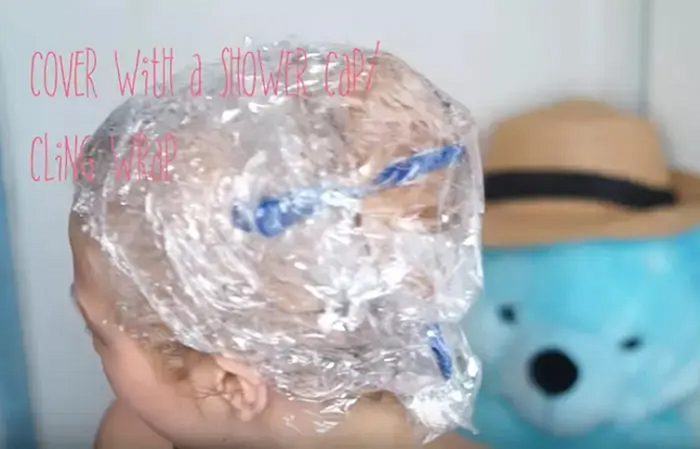
Making sure you use enough bleach mixture on your strands. Once the mixture has been applied, just pop on a shower cap or plastic bag and set your timer.
Step 6: Now you wait
Processing time depends on the manufacturer recommendation and also the natural level of starting point and end result desired. It's important to understand what hair level (shade) you're starting with and what color you want to achieve to figure out how long the bleach mixture should stay on your head.
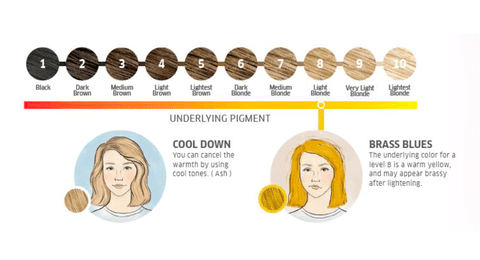
The level system for hair tells you how light or dark your color is going to be. One is the darkest and 10 is the lightest. It's important to understand that all blondes must be at least level seven or above. So if you are starting at a level one you have to lift (bleach/lighten) your hair six levels to level seven to even begin to see any type of blonde.
Once you figure out your hair level and how light you want it, you can determine the wait time. If you want your hair to lift as light as possible then leave the mixture on for 35-4o minutes (remember to never exceed 45 minutes). You might want to check your hair to see if it's lifted to the level you desire.
Step 7: Wash It
When it's fully processed, it's time to wash it out. Use lukewarm water, too hot or cold of water can shock your hair in its already fragile state. Make sure to completely rinse out the bleach and gently wash your hair to get out all the product.
Step 8: Assess And Bleach Again (If Needed)
Your hair may look yellow or orange even by this step and that's okay, it just means you might have to bleach again. Make sure you assess and check the health of your hair using the stretch technique Kandasamy recommended in the first step. Using the hair level chart discussed in Step 6, determine your hair level to see if you need to bleach your hair again. If you do need to bleach again, follow steps three to seven again ( your hair needs to be dry).
Most importantly, make sure you're giving your hair enough recovery time and consider waiting a couple of days before doing another bleach treatment
Step 9: Time To Tone
Toner will help neutralize any brassiness or yellow hues that will be lingering in your hair after bleaching. Before you can tone, just make sure that your hair is light enough. It is important to understand that if the hair hasn't been lifted light enough or to the proper level, putting a toner on it is not going to fix the problem and could possibly create a very unpleasant color. So always make sure you are using toner on the correct (hair) level.
Step 10: Invest in a Purple Shampoo/Mask
Similar to the toner, a purple shampoo helps eliminate orange or yellow hues in your hair. Using a non-chemical toner (purple shampoo) is a great way to upkeep your blonde hair to keep it from getting brassy. Use a purple shampoo once or week or whenever your hair starts to get too yellow.
Step 11: Repair
After all the chemical damage you just did to your hair, it's important to put some love back into it to try and repair, our best advice is always to use a professional hair care product–once or twice a week, use a hydrating hair mask. Also, avoid using heat on your hair, you'll want to minimize thermal heat like excessive blow-drying and ceramic heat styling in the 3-4 weeks after bleaching your hair.
CANNELLA HAIR DESIGN – That's all you need to know about how to safely bleach your hair at home. Most experts would recommend you to go see your professional colorist and let them do their job, so do us. But if you are still giving it a try, go ahead, just remember to follow the instruction extremely carefully!
And if you have any questions, don't hesitate to contact us right now!
how to bleach hair without damage
Source: https://cannellabeautyschools.com/how-to-bleach-hair-at-home-safely-without-damage/
Posted by: davisthaverom67.blogspot.com
0 Response to "how to bleach hair without damage"
Post a Comment