

how to install opencv on raspberry pi
OpenCV is an incredible computer vision library, and the Raspberry Pi is an awesome piece of hardware. You can bring them together for your projects. In fact, I am writing this article as a reference so you folks can set up your Pi with OpenCV for a series of tutorials I'm doing.
We're going to install OpenCV on the Raspberry Pi for Python projects. Note: There are two ways to install this:
- Pip install (30 seconds)
- Compile from source (hours)
We are covering the Pip install here because it's fast and easy. It will work for most OpenCV projects, and it's an easy solution. However, there will be libraries and Non-Free algorithms that are not installed with Pip. So if you want the FULL library, you'll need to do build OpenCV from source. For most people, the Pip install should be just fine.
You may also notice we're installing OpenCV with the contrib modules included. You can do a smaller opencv-python installation if you choose.
So let's get started.
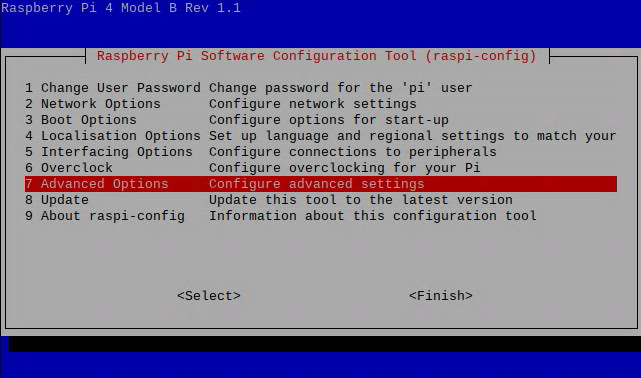
Step 1: Set Up Your Raspberry Pi
The first thing you should do is make sure your Pi is using the full SD card. It's easy enough to do.
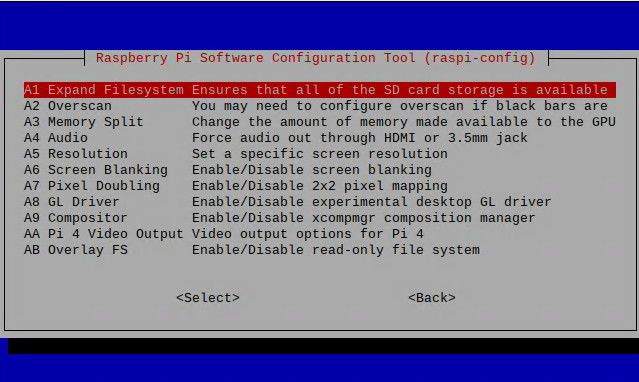
Reboot the machine
Now you can check to make sure you've got the space:
Cool, we're ready. Let's update the system:
sudo apt-get update && sudo apt-get upgrade This is all you'll need to do the Pi for now to get it ready.
Step 2: Get Pip and Install OpenCV
Now, we'll get pip and use that to install OpenCV.
mkdir ~/src && cd ~/src wget https://bootstrap.pypa.io/get-pip.py $ sudo python3 get-pip.py There are two ways to install OpenCV. You may want to install it for the whole system or use a Python Virtual Environment.
I suggest using the Python Virtual Environment method because it's more portable, and you can use different libraries with different projects on the same machine. There isn't a lot of overhead to using the virtual environment method, but I'll show both ways:
Option 1: Install OpenCV for the Whole System:
sudo pip install opencv-contrib-python And you're done. You
Or,
Option 2: Install OpenCV in a Python Virtual Environment:
sudo pip install virtualenv virtualenvwrapper 
add the following lines to the bottom:
export WORKON_HOME=$HOME/.virtualenvs export VIRTUALENVWRAPPER_PYTHON=/usr/bin/python3 source /usr/local/bin/virtualenvwrapper.sh Save the file, and run source on your .bashrc to reload the changes:
Now, you can create a virtual environment named pistats (or whatever you like)
mkvirtualenv pistats -p python3 Then install OpenCV:
pip install opencv-contrib-python 
Ok, now we're up and running.
What Can I Do With This?
OpenCV is an amazing image analysis and processing package. It's used for some serious computer vision projects.
The Raspberry Pi is a complete Linux computer in a small package. So the possibilities are endless with this:
- Real-time Face Recognition: an End-to-end Project
- Increasing Raspberry Pi FPS with Python and OpenCV
- Automatic Vision Object Tracking
The list can go on forever. Here's a good list of OpenCV projects you can check out.
Want to learn more about the Raspberry Pi? Check out the Raspberry Pi for Developers course!
how to install opencv on raspberry pi
Source: https://www.jeremymorgan.com/tutorials/raspberry-pi/how-to-install-opencv-raspberry-pi/
Posted by: davisthaverom67.blogspot.com
0 Response to "how to install opencv on raspberry pi"
Post a Comment